
Planning to start a blog, business website, or online store in 2026? Hostinger offers an affordable and beginner-friendly hosting solution for new website owners. At the same time, WordPress remains the most popular CMS in the world, powering more than 43% of websites across the internet. Even better, you can create and manage your website without needing advanced technical skills
In this step-by-step guide I’ll walk you through exactly how to install WordPress on Hostinger from logging in to your dashboard to seeing your brand new website live
What You’ll Need Before You Start
Before jumping into the installation, make sure you have:
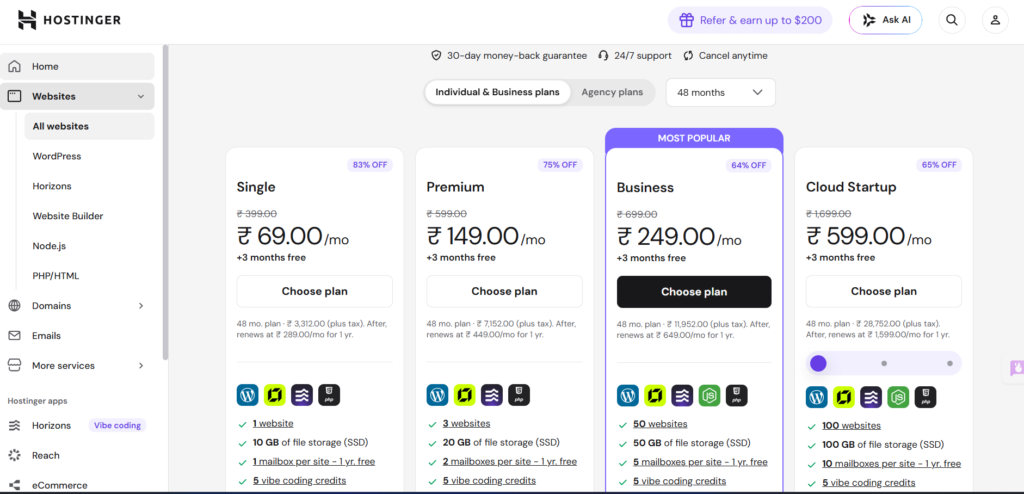
A Hostinger hosting plan (Premium or Business plan recommended both include a free domain
A domain name (you can register one free with Hostinger or connect an existing one)
Your Hostinger account login credentials email and password)
That’s it. No coding, no FTP, no complicated setup. Hostinger handles everything through their clean, custom dashboard called hPanel
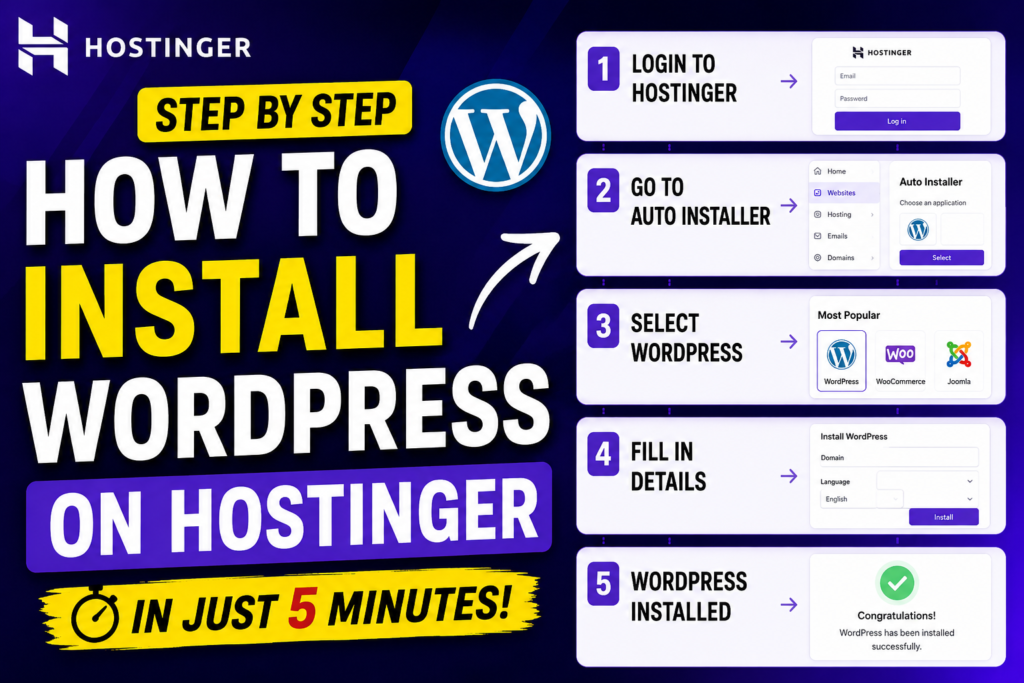
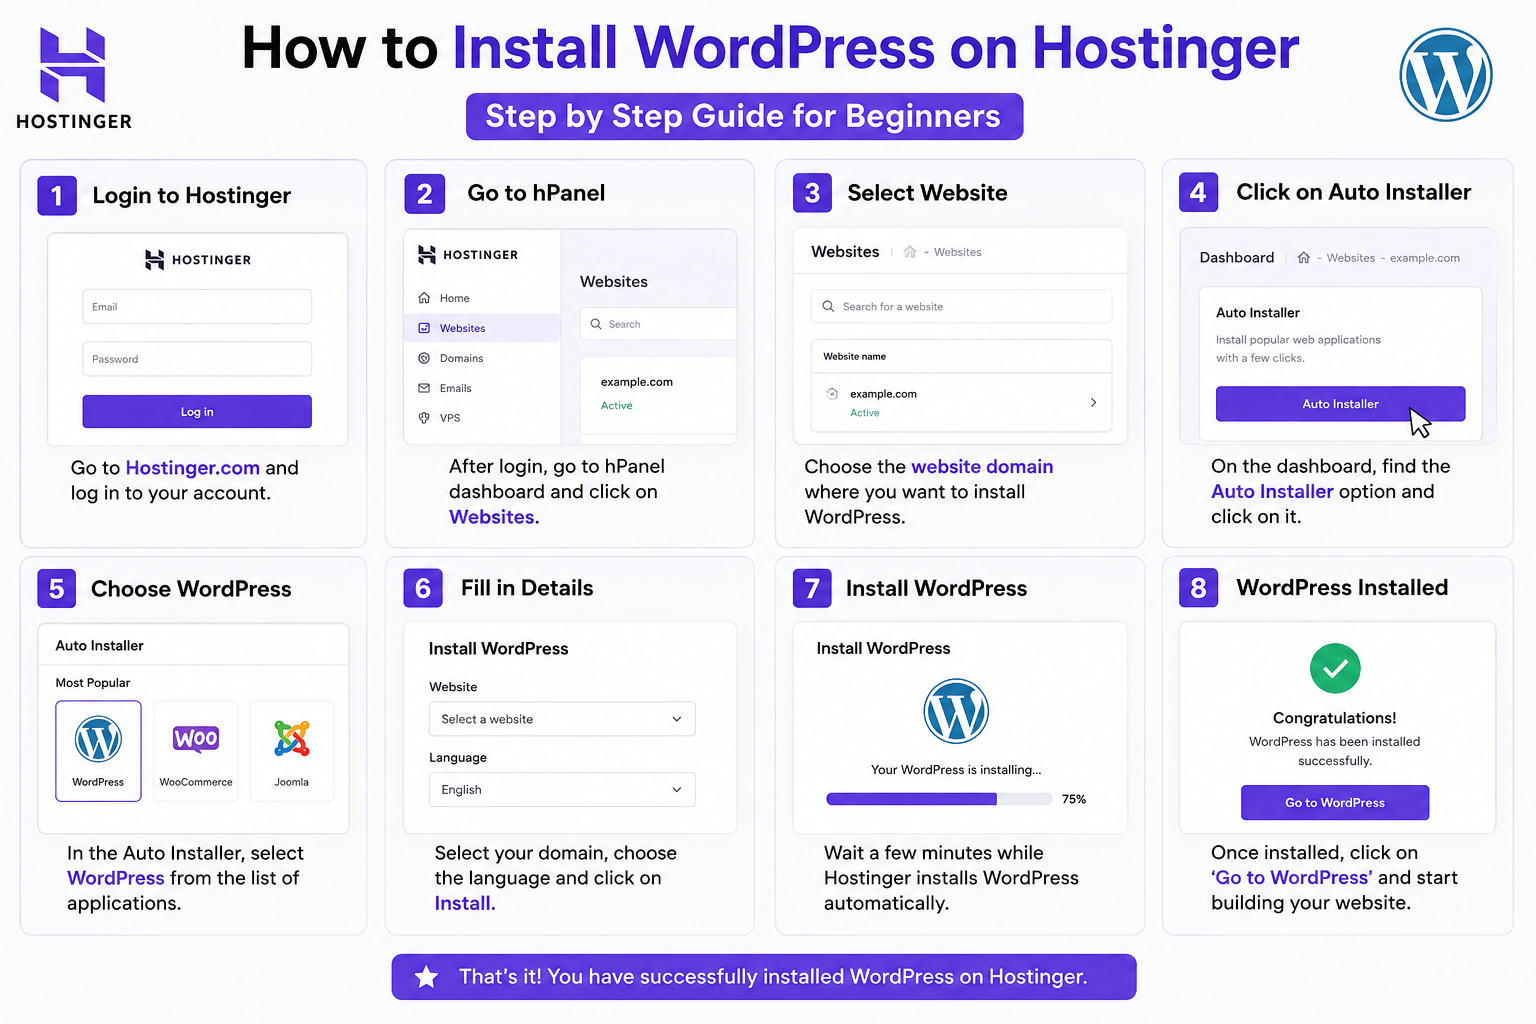
Step 1: Log In to Your Hostinger Account
Head over to hostinger.com and click the Log In button in the top right corner.
Enter your email address and password, then click Log In. You’ll land on the main Hostinger dashboard.
Pro Tip: If you just signed up, Hostinger may walk you through a quick setup wizard automatically. If that happens, just follow the on-screen prompts it will guide you straight to WordPress installation.
Step 2: Go to Your Hosting Dashboard (hPanel)
Once you’re logged in, you’ll see your account overview. Click on Manage next to your hosting plan. This takes you into hPanel Hostingers custom control panel.
hPanel is designed to be much simpler than the traditional cPanel that many older hosts use. Everything is laid out clearly, with easy-to-find menus and helpful tooltips
Step 3: Find the WordPress Installer
Inside hPanel, look for the Website section. You’ll see an option called Auto Installer or you may see a direct WordPress button depending on your plan.
Click on WordPress. This opens Hostinger’s one-click WordPress installer.
Alternatively, you can:
Go to hPanel → Website → Auto Installer
Click the WordPress icon
Hit Select
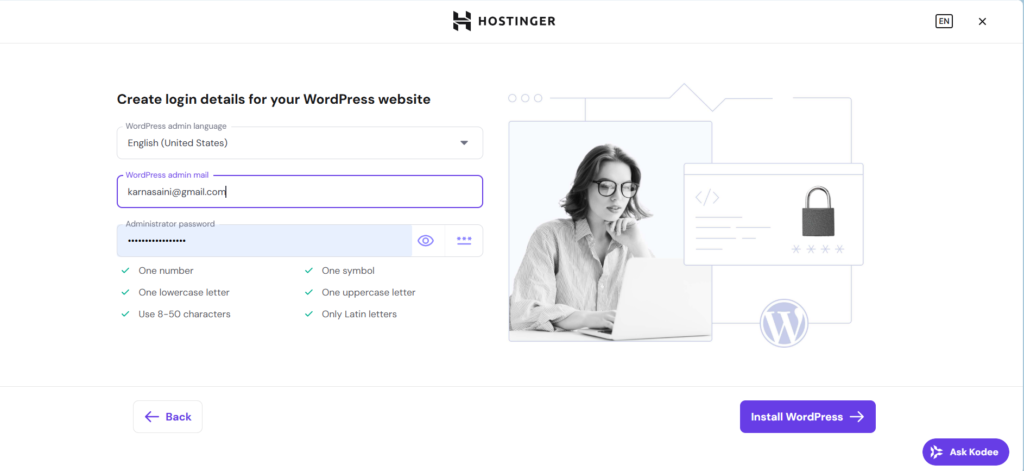
Step 4: Fill In Your WordPress Details
Now you’ll see a simple form asking for a few basic details. Here’s what to fill in
Website URL
Choose the domain where you want to install WordPress. If you only have one domain, it will be pre-selected. If you have multiple domains, pick the right one from the dropdown.
Subdirectory: Leave this blank unless you want WordPress installed in a subfolder (like yourdomain.com/blog). For most people, just leave it empty to install on the main domain
Administrator Details
Admin Username — Pick a unique username. Avoid using “admin” as it’s a common hacking target.
Admin Password — Use a strong password with letters, numbers, and symbols. Hostinger will suggest one if you click the generate button.
Admin Email — Enter your email address. This is where you’ll receive WordPress notifications and password resets
Website Details
Title Enter your site’s name (you can always change this later inside WordPress).
Language Select English for a USA audience
WordPress Version
Leave this on the latest version (Hostinger auto-selects it). Always use the most recent version for security.
Once everything is filled in, click Install.
Step 5: Wait for Installation to Complete
Hostinger will now automatically install WordPress for you. This usually takes 30 to 60 seconds.
You’ll see a progress bar. Once it hits 100%, you’re done. Hostinger will display a confirmation screen with:
Your website URL
Your WordPress admin login URL (usually yourdomain.com/wp-admin)
Your username and a reminder to check your email for credentials
Important: Save your WordPress admin URL, username, and password somewhere safe. You’ll need these every time you log in to manage your site
Step 6: Log In to Your WordPress Dashboard
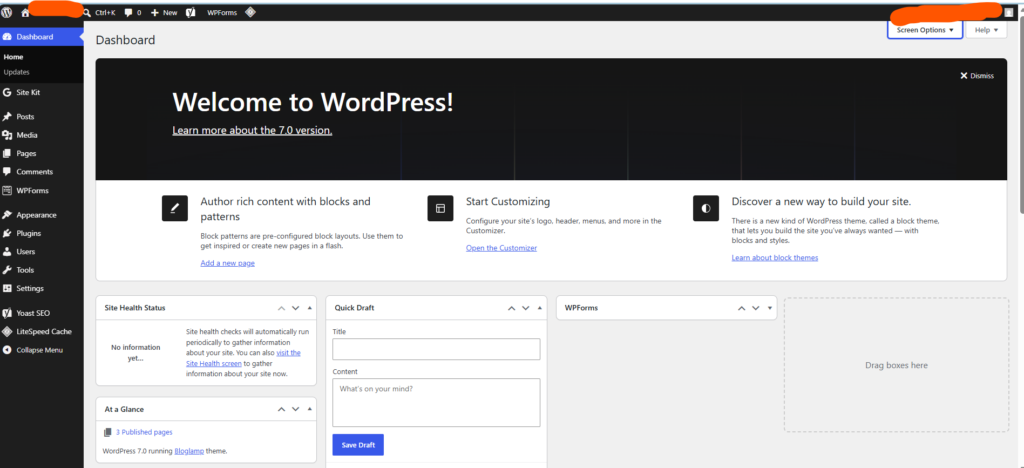
Now go to yourdomain.com/wp-admin in your browser.
Enter the username and password you set during installation, then click Log In.
Welcome to your WordPress dashboard! This is where you’ll:
Choose and install a theme (design for your site)
Install plugins (extra features and tools)
Create pages and blog posts
Manage all your website content
Step 7: Set Up SSL (Free HTTPS) — Don’t Skip This
Before you start building your site, make sure your SSL certificate is active. SSL gives your website the padlock icon in the browser and ensures your visitors’ data is secure. Google also ranks secure sites higher.
Here’s how to enable SSL on Hostinger:
Go back to hPanel
Find SSL under the Security section
Click Install next to your domain
Wait 1–2 minutes for it to activate
Once SSL is active, your site will load on https:// instead of http://. Then go to your WordPress dashboard → Settings – General and make sure both the WordPress Address and Site Address show https://
Step 8: Choose a Theme
Your site is live — but it needs a design. WordPress comes with a default theme, but you’ll want to customize it.
To install a new theme:
In your WordPress dashboard, go to Appearance → Themes
Click Add New
Browse free themes or search for a specific one (popular beginner choices: Astra, Kadence, Hello Elementor)
Click Install then Activate
For a USA audience, clean and fast-loading themes like Astra or Kadence work great. They’re free, lightweight, and look professional.
Step 9: Install Essential Plugins
Plugins add functionality to your WordPress site. Here are the must-have plugins for any new WordPress website:
Plugin What It Does
Yoast SEO or Rank Math Helps you optimize for Google
WPForms Lite Adds a contact form to your site
UpdraftPlus Automatically backs up your website
WP Super Cache Makes your site load faster
Wordfence Protects your site from hackers
To install a plugin:
Go to Plugins → Add New
Search for the plugin name
Click Install Now then Activate
Step 10: Create Your First Page or Post
Now you’re ready to start adding content.
To create a page (like About, Contact, or Home):
Go to Pages → Add New
Write your content using the block editor
Click Publish
To write a blog post:
Go to Posts → Add New
Write your article, add images, and format with headings
Click Publish
That’s it — your post is now live on the internet
Common Issues and Quick Fixes
WordPress admin URL not working?
Wait a few minutes and try again. Sometimes DNS takes a little time to propagate after installation.
Site showing “Not Secure” warning?
Your SSL hasn’t activated yet. Go back to hPanel and check the SSL section. If it’s still pending, wait up to 10 minutes.
Forgot your WordPress password?
Go to yourdomain.com/wp-login.php and click Lost your password? Enter your email and WordPress will send a reset link.
Site loading slowly?
Install the WP Super Cache plugin and enable caching. Also make sure you selected a US-based server location when setting up your Hostinger plan
Why Hostinger Is a Great Choice for WordPress in 2026
Hostinger stands out from other budget hosting providers for several reasons:
LiteSpeed servers — significantly faster than Apache-based hosting
NVMe SSD storage — faster data read/write speeds
Free SSL certificate included on all plans
One-click WordPress installation — no technical knowledge needed
99.9% uptime guarantee — your site stays online
US data centers — fast load times for American visitors
hPanel — much easier to use than traditional cPanel
Starting at $2.99/month — one of the most affordable options available
For beginners building their first WordPress site, bloggers, small business owners, and freelancers, Hostinger hits the sweet spot of price, performance, and ease of use.
Final Thoughts
Installing WordPress on Hostinger is genuinely one of the easiest things you can do in web hosting. The whole process — from logging in to seeing your WordPress dashboard — takes under 5 minutes.
Here’s a quick recap of the steps:
Log in to Hostinger
Open hPanel
Go to Auto Installer → WordPress
Fill in your admin details
Click Install
Log in to yourdomain.com/wp-admin
Enable SSL
Pick a theme and install plugins
Start publishing content
Once your site is live, focus on writing helpful content, optimizing for SEO, and building your audience. Hostinger gives you a solid foundation — the rest is up to you